Globus#
The Globus platform allows you to efficiently move large amounts of data between Pixiu and other systems — such as HPC clusters like Hydra, storage collections at other research institutions, or your own local computer. Transfers are managed by the Globus infrastructure, so you do not need to keep an active connection while they run.
Pixiu is available in Globus with its own collection. The name of the Pixiu collection is VUB Pixiu S3. No VPN connection is needed to use it.
Note
Other VUB collections available in Globus:
VSC VUB Hydra — the Hydra HPC cluster
VUB OneDrive — VUB OneDrive storage
Globus web interface#
Please follow the steps below to access Pixiu through the Globus web interface:
Log in to the Globus web app
Open the File Manager on the left panel
Write VUB Pixiu S3 in the Collection search field and select it
The first time you open the collection you will be asked for authentication/consent
Click on Continue
Select the identity linked to your VUB account (a link of the form username@vub.be)
Click Allow
Your Pixiu buckets will appear as top-level directories. You can navigate into any bucket you have access to and browse, upload, or download files
Note
Paths in Pixiu follow the S3 object storage model: the bucket name is the top-level directory and objects within the bucket are shown as files and folders. This differs from the traditional POSIX filesystem layout used on Hydra.
Data transfer to/from your local computer#
From the Globus web interface you can upload and download files directly between Pixiu and your local computer without any intermediate steps.
For larger or more frequent transfers you can install Globus Personal Connect on your local machine:
Once installed and running, your computer appears as a personal collection in the Globus web interface. You can then initiate transfers between your computer and the Pixiu collection just like any other Globus transfer.
Tips and limitations#
No VPN required — unlike other Pixiu clients, Globus transfers do not require a connection to the VUB network or VPN.
S3 paths — bucket names appear as top-level directories. Paths within a bucket do not start with a leading slash (e.g.
my-bucket/folder/file.txt).No recursive delete — Globus does not support deleting entire directories in S3 collections. Remove objects individually or use another client such as S3cmd or Rclone.
File naming — the same character restrictions that apply to other Pixiu clients also apply to transfers via Globus. See the Tips and Tricks section in the Introduction to Pixiu for the full list.
Snapshots — point-in-time snapshots of your data are not accessible through Globus. Use Cyberduck to recover files from snapshots instead.
Share data with Globus#
Globus allows you to share data with others, even if they do not have access to Pixiu. To do so, you create a guest collection — a shared view of a folder or bucket in Pixiu. You can then give individual users, groups, or even the public read or write access to that data.
Warning
Sharing data is a serious responsibility. Data may not be shareable due to confidentiality, copyright, or other restrictions. Always make sure you have the right to share any data before doing so.
Create a guest collection#
There are two ways to create a guest collection:
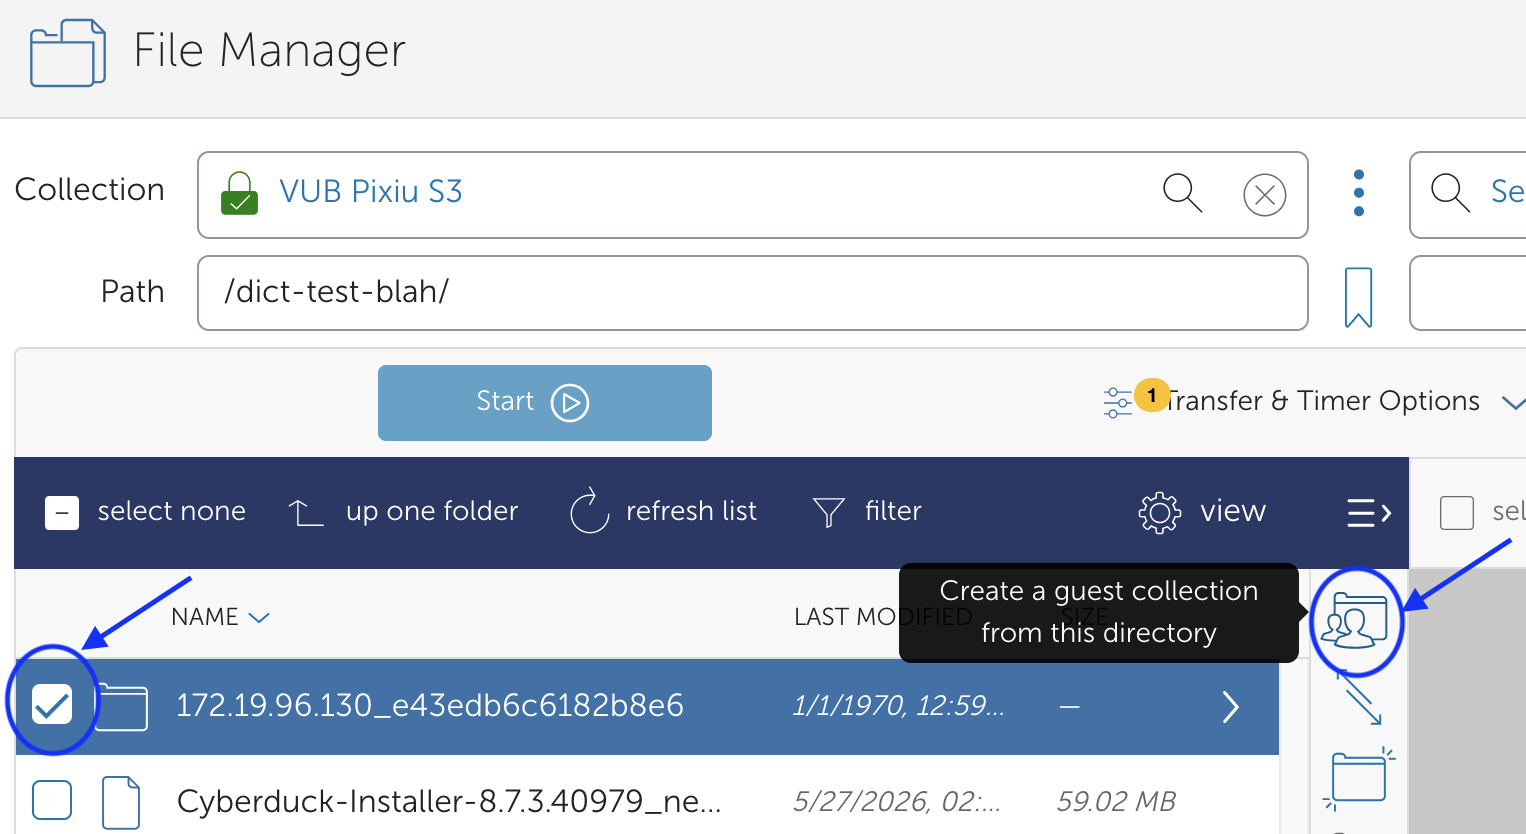
In the File Manager, check the box next to the folder you want to share and click Create a guest collection from this directory.
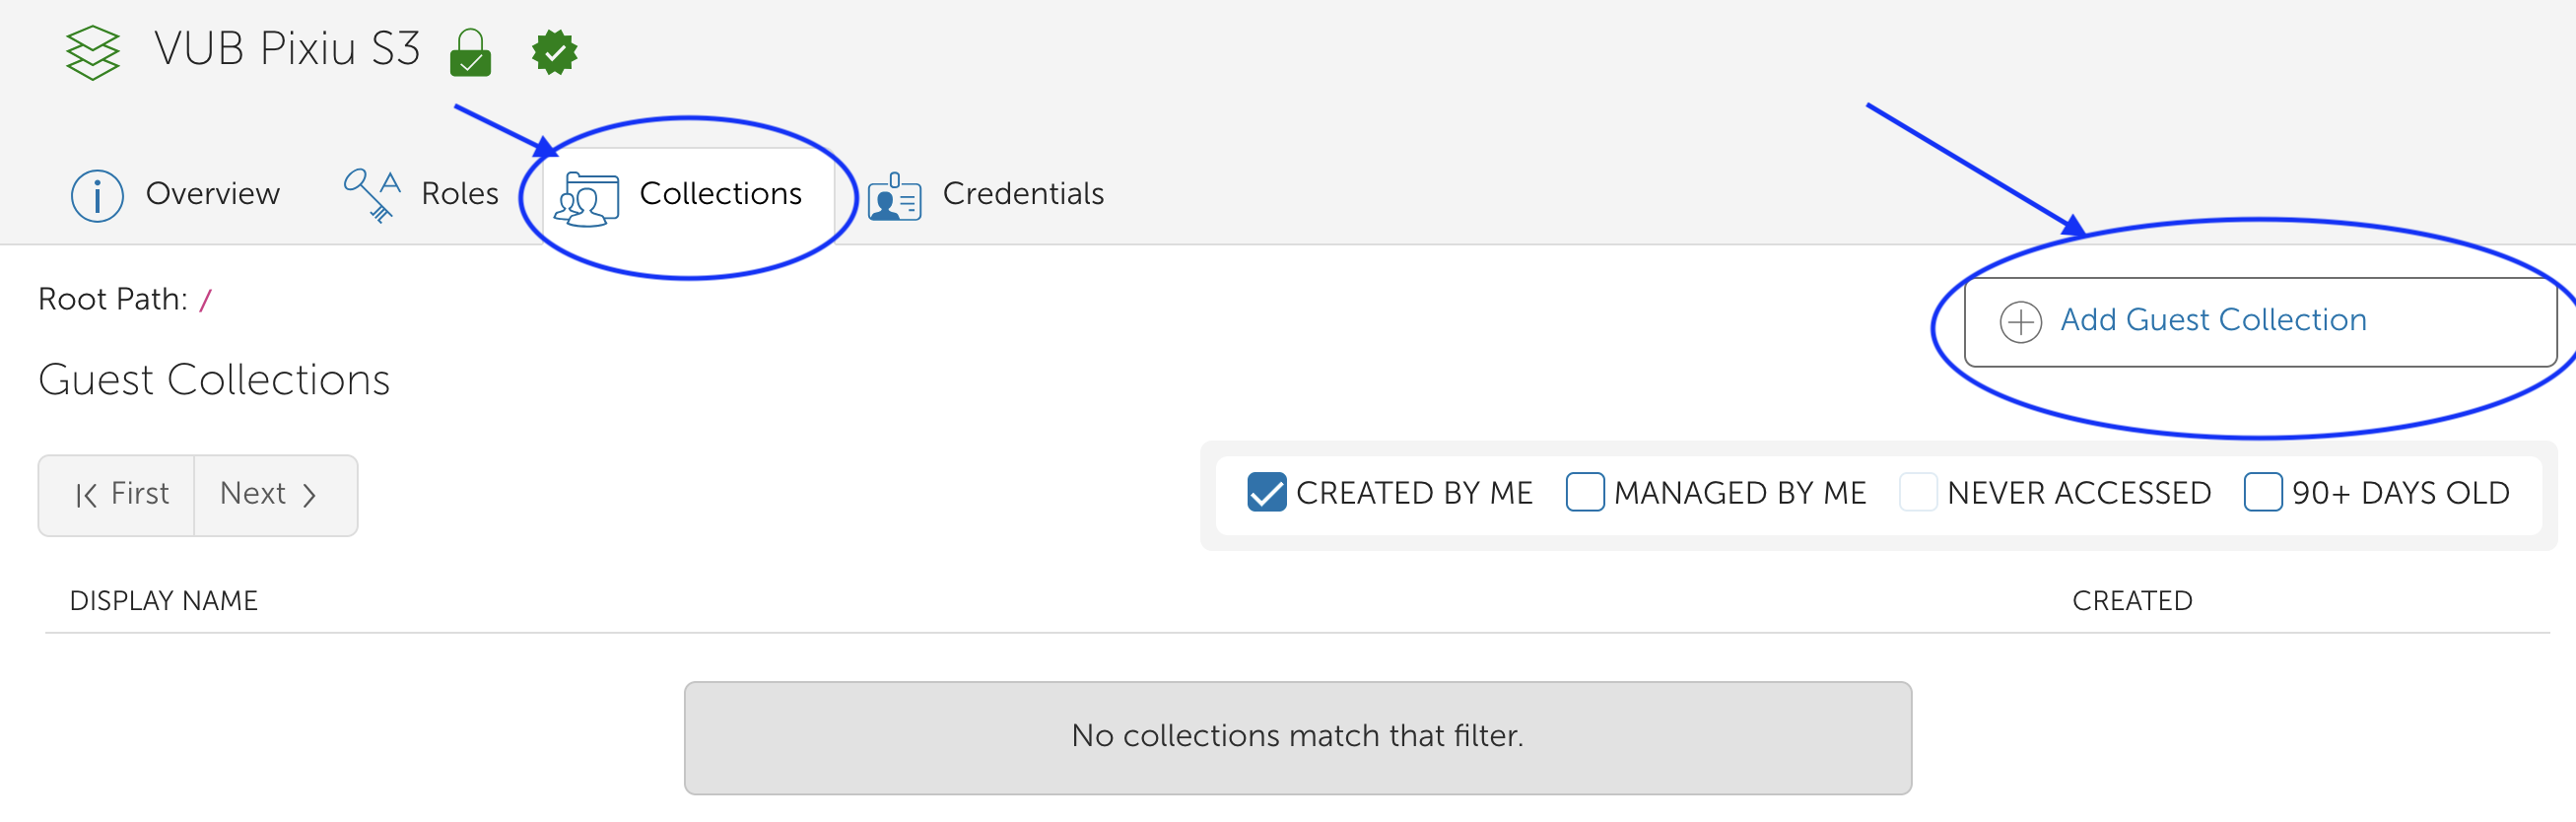
On the left, click Collections, search for VUB Pixiu S3, click on it, and click Add Guest Collection under the Collections subtab.
Both methods bring you to the Create New Guest Collection page:
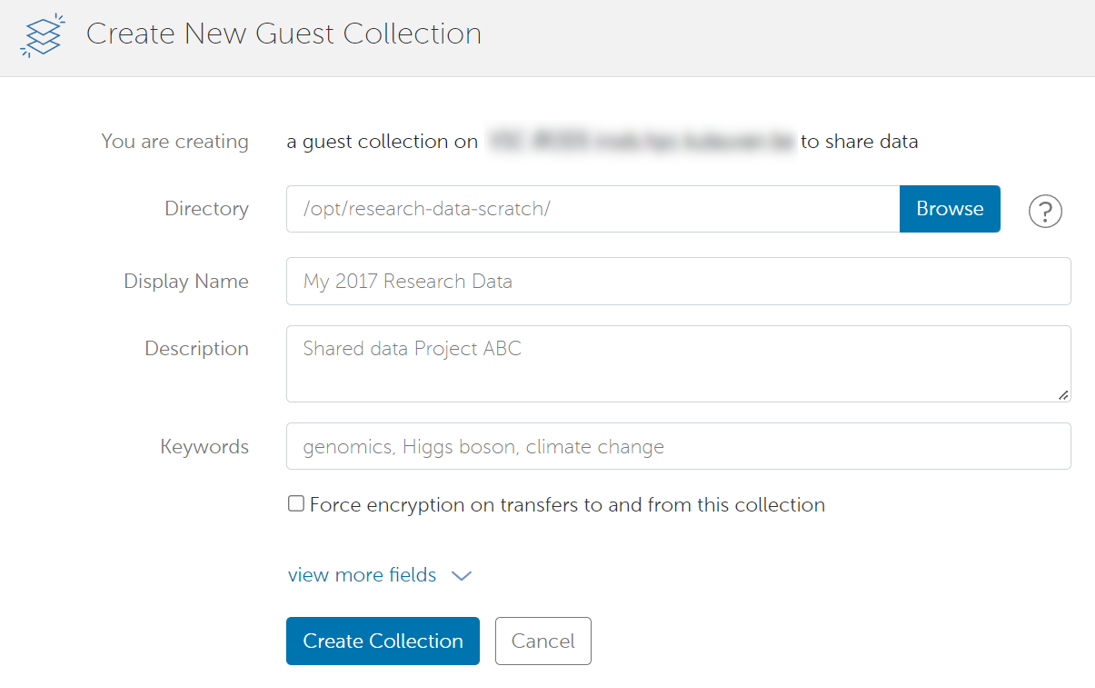
Provide:
The path to the directory you want to share (pre-filled if you came from the file manager)
A name for the guest collection
The remaining fields on that page are optional.
Set permissions#
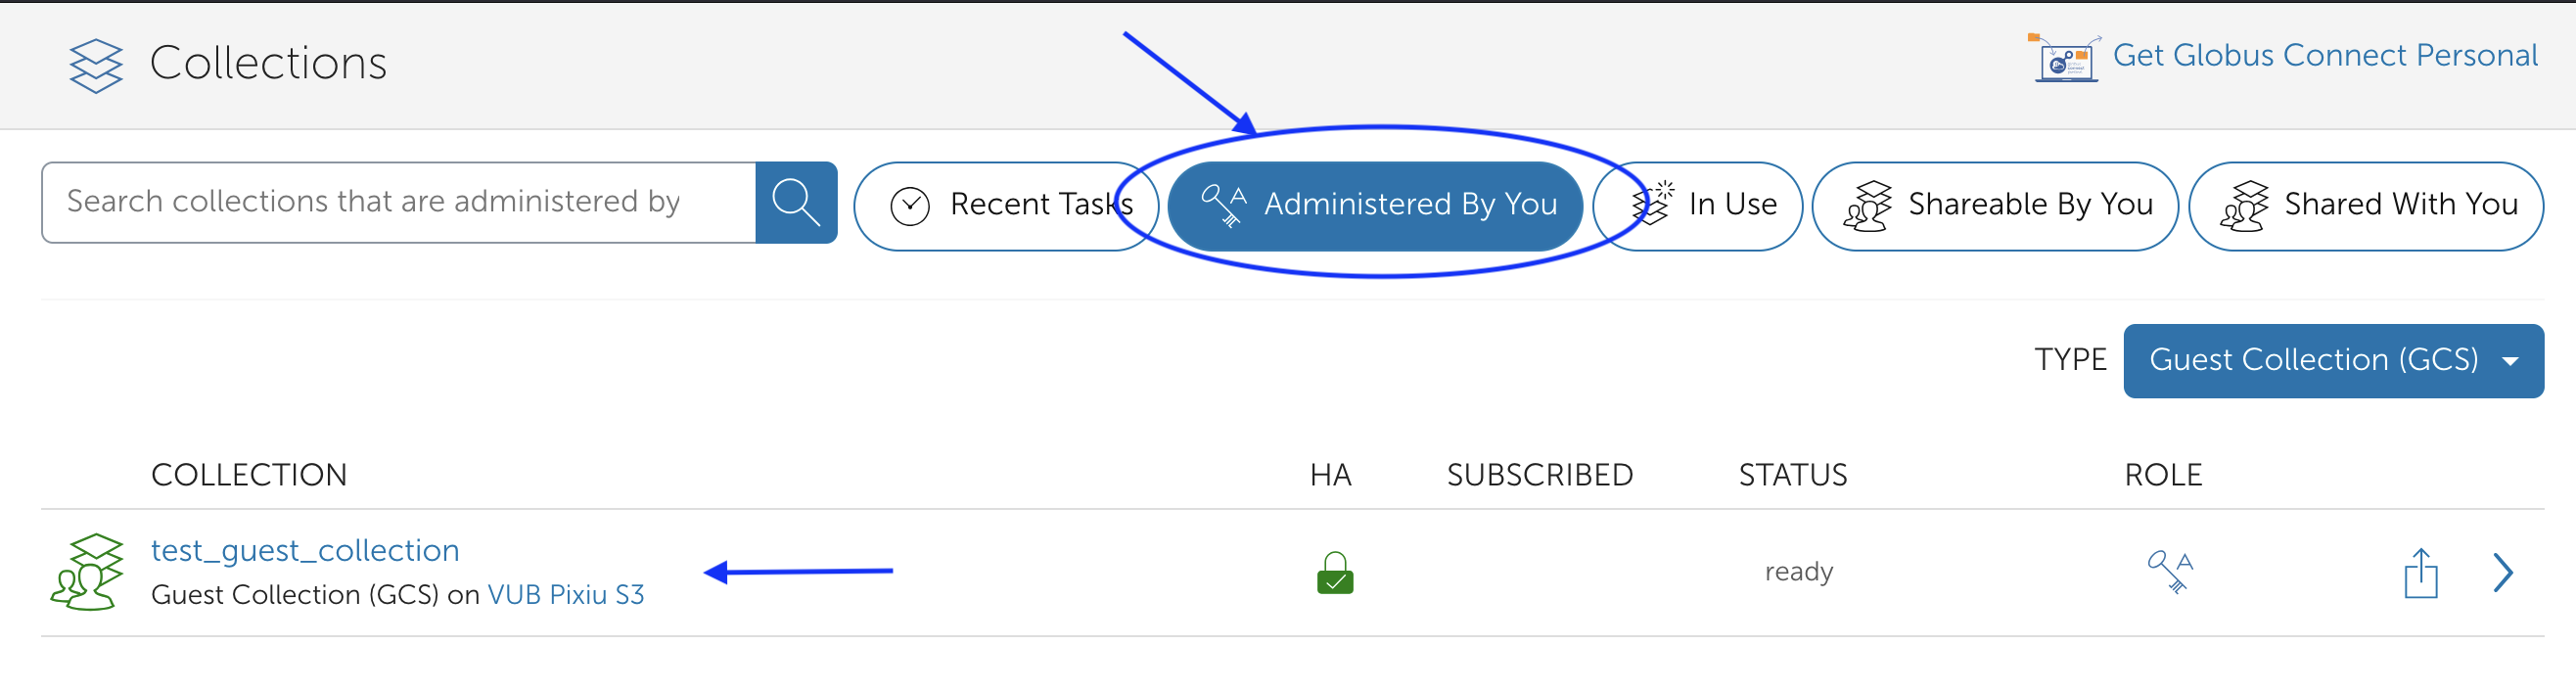
After creating the guest collection you are taken directly to the permissions page. You can return to it later by navigating to Collections → Administered by you → click your guest collection → permissions subtab.
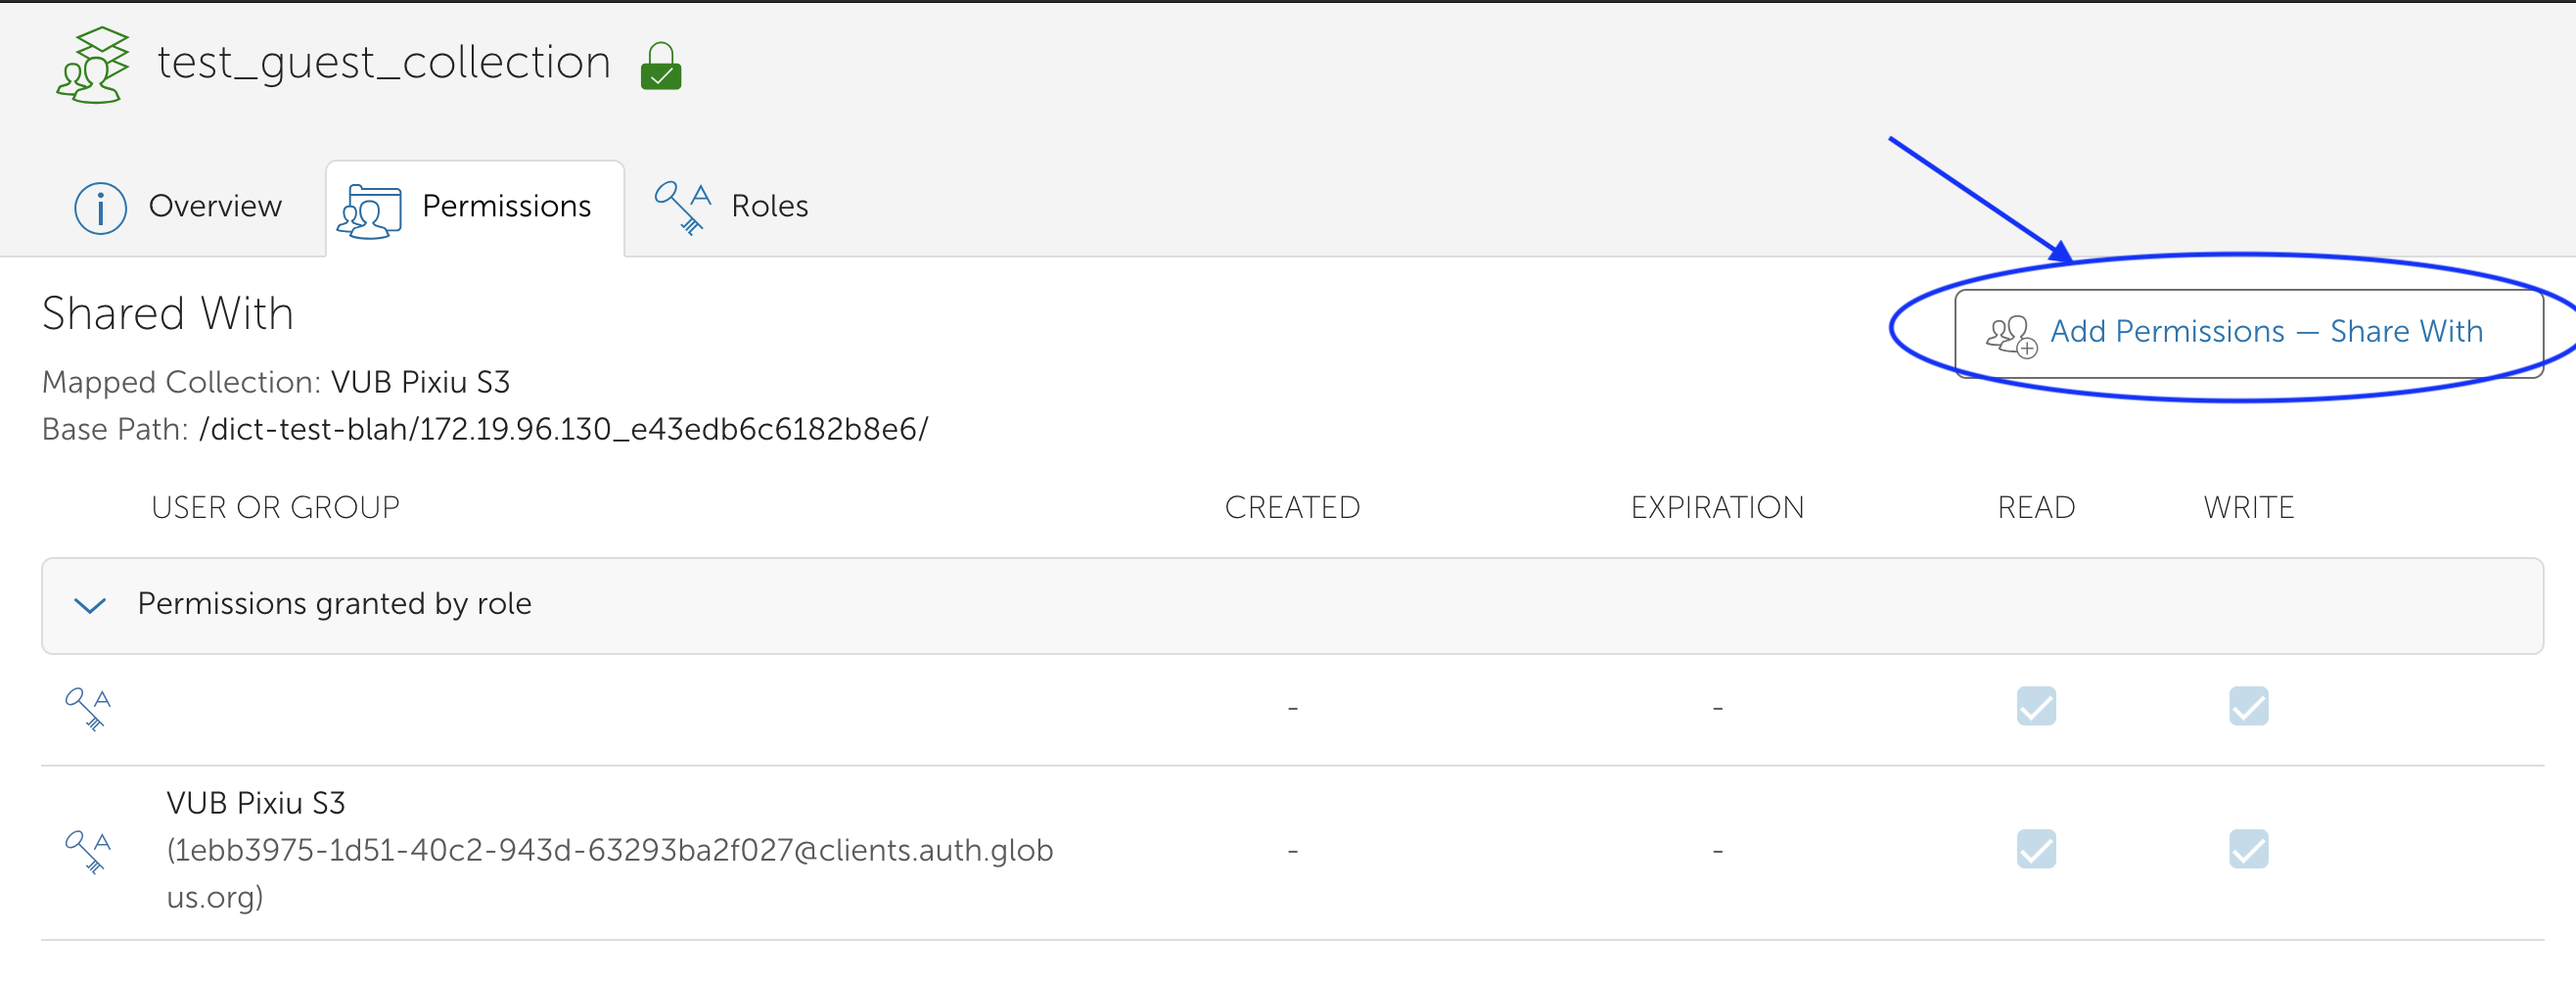
Click Add permissions to open the permission dialog:
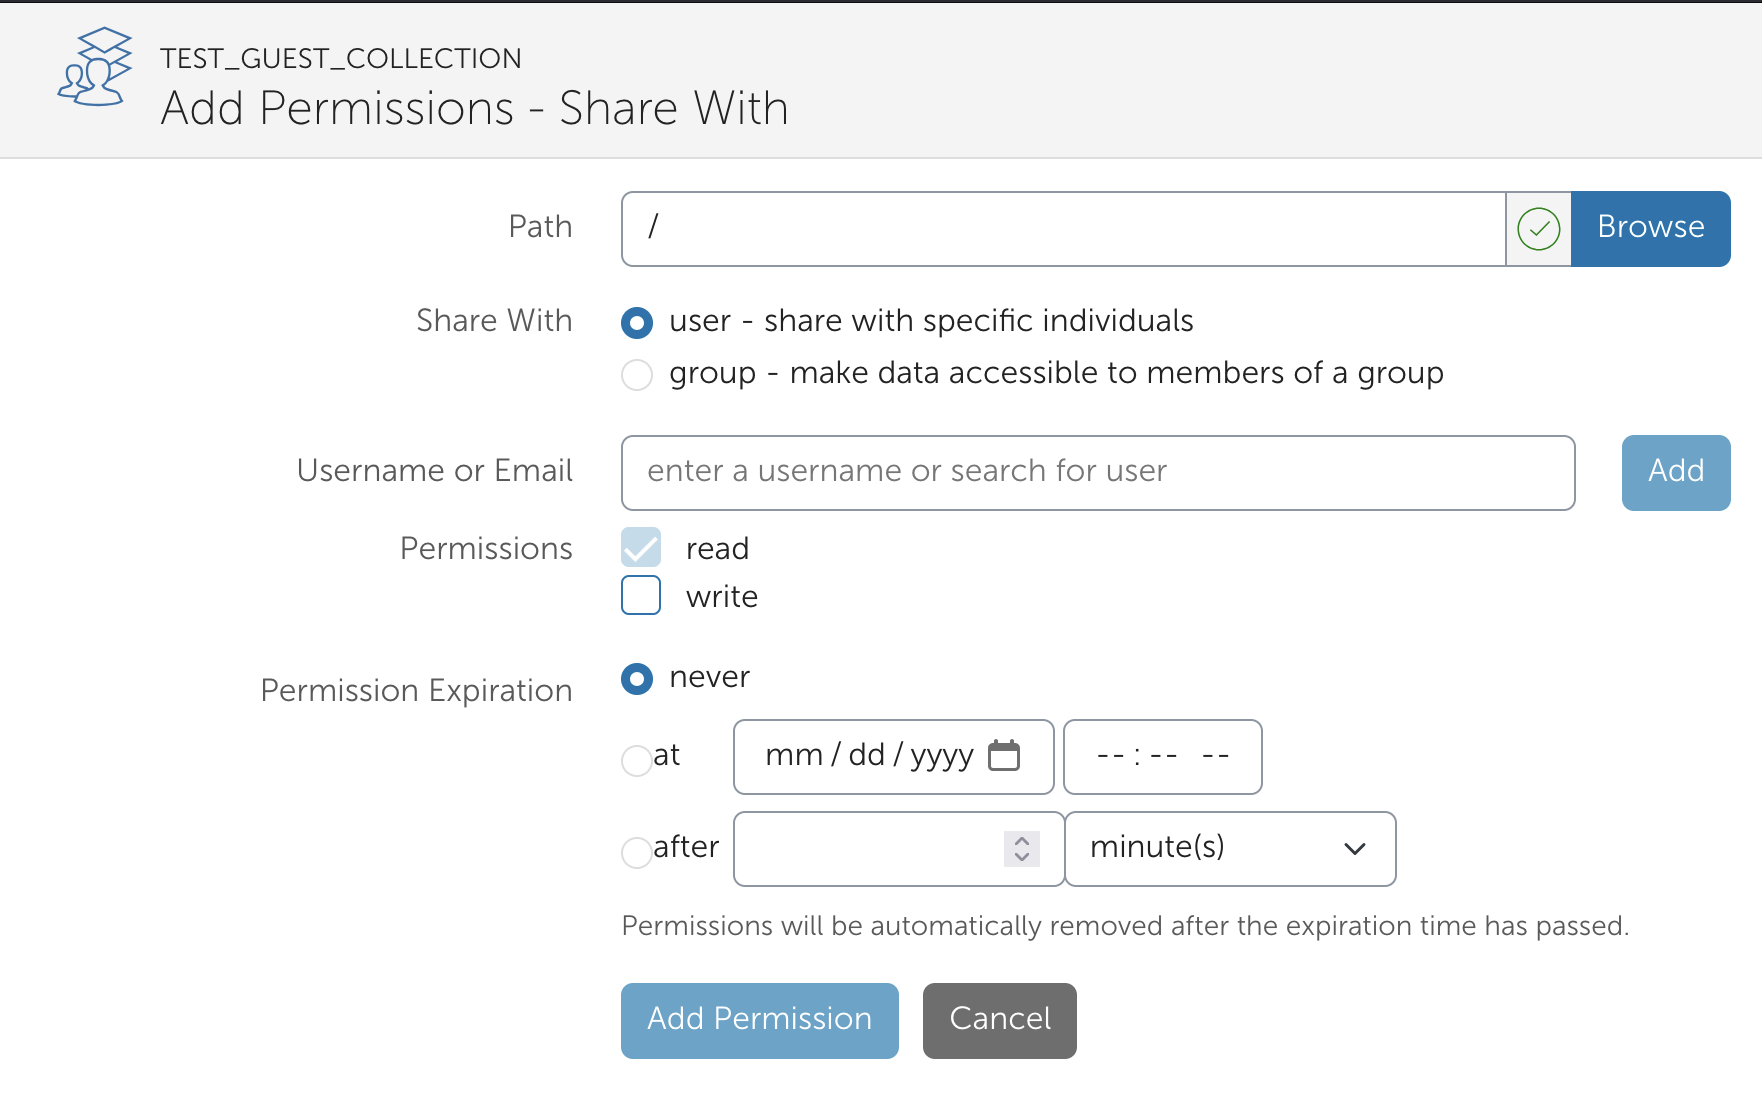
Path — the path within your guest collection to which the permission applies. Leave empty to apply from the root.
User or group — search by username or e-mail address.
Access level — choose read or write.
Permission Expiration — You can have the access expired automatically.
Once created, the permission appears in the overview:
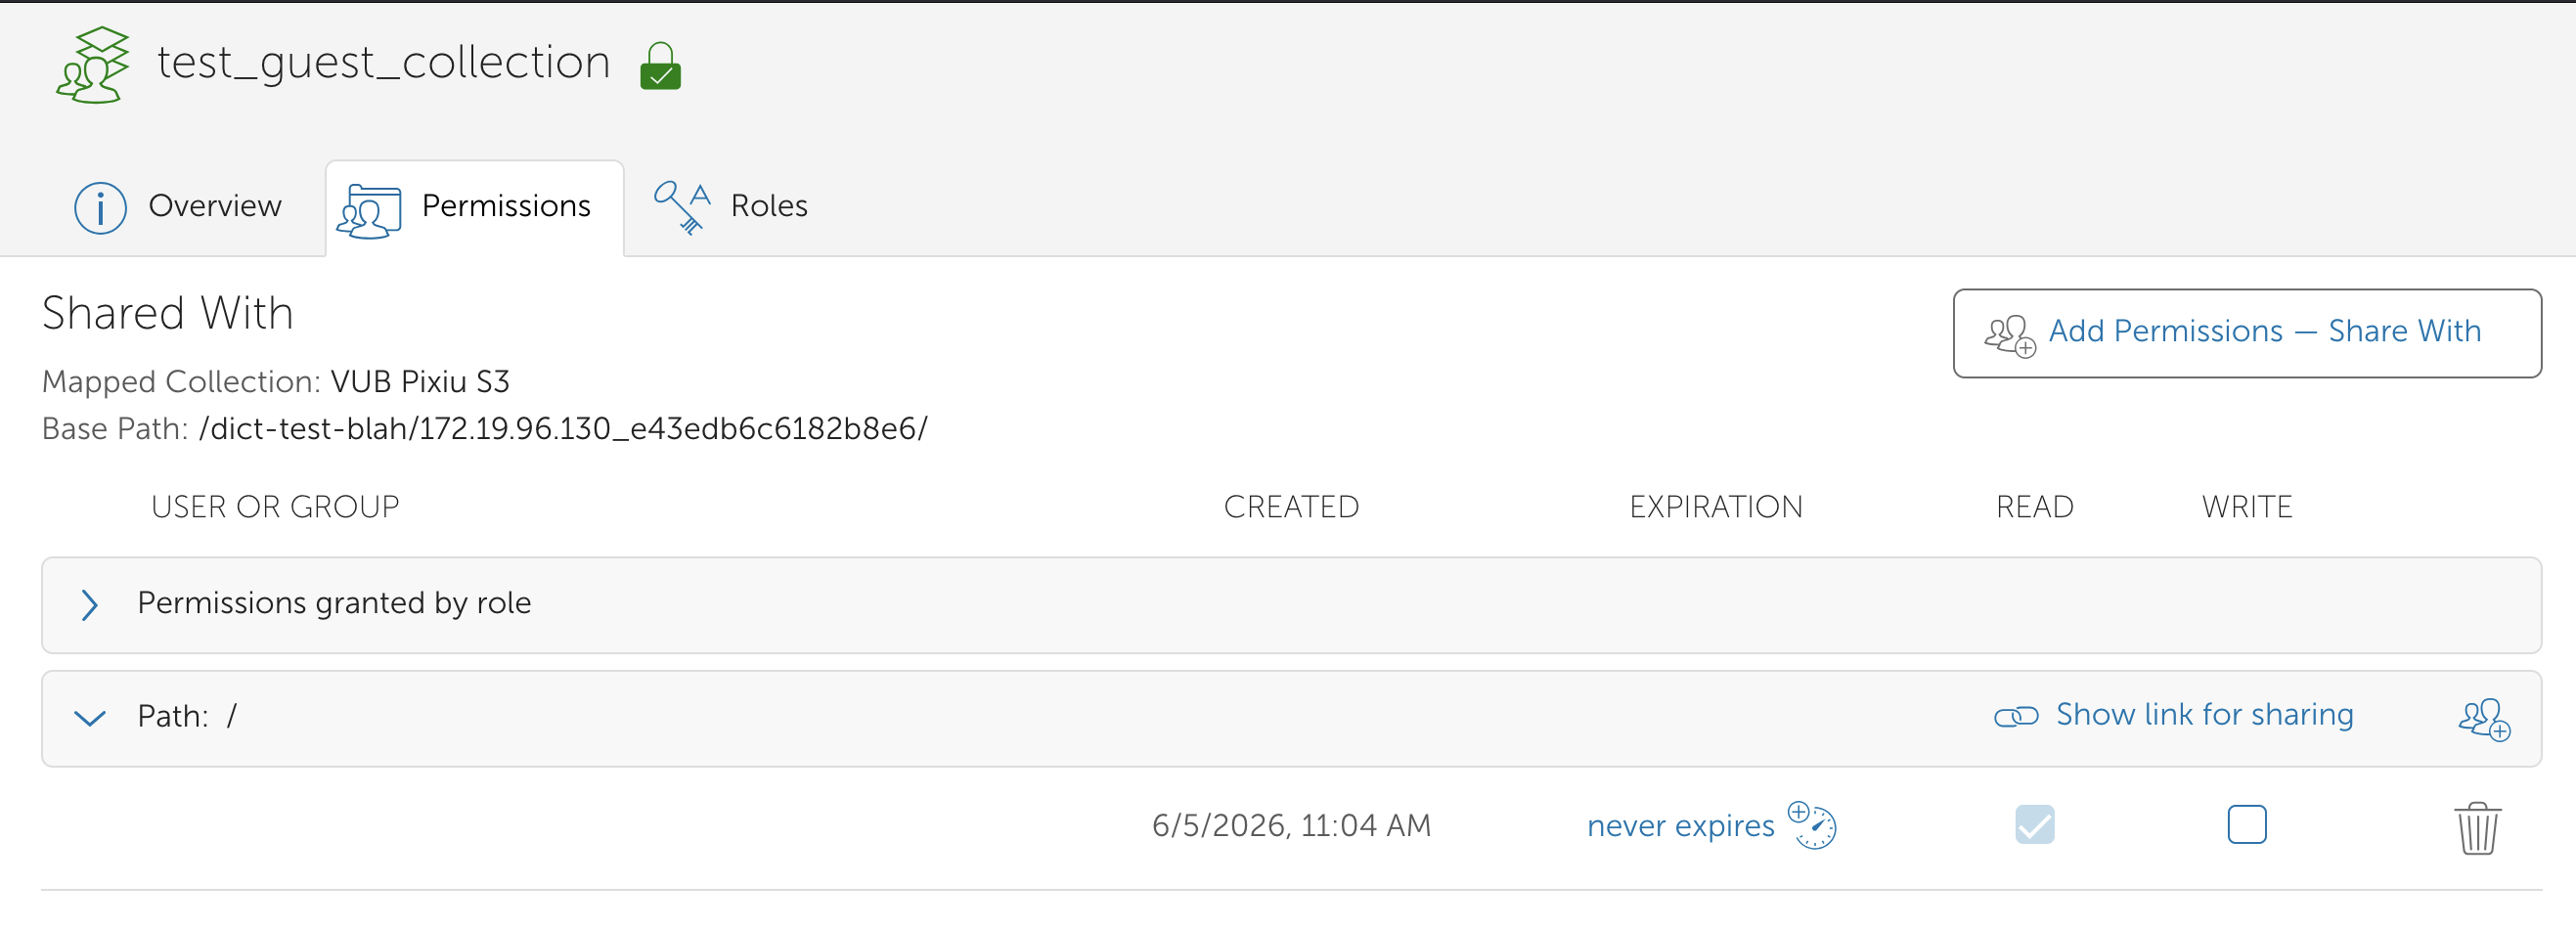
Check or uncheck the write checkbox to modify access. Click the dustbin icon to remove the permission entirely.
Delete a guest collection#
Only an administrator can delete a guest collection. Go to Collections → Administered by you, click on your collection, and use the remove button:
